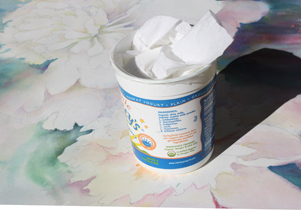
the toilet paper solution (tissue coming up through the center with the cardboard gone)
“That’s worth the price of the class!” When someone sings this out in a class — after I have just made a helpful hint aside — I always cringe. I hope not. But when you have struggled for ages with something and then hear a solution that sounds so easy, you think you might have paid to have known that.
One such time was when a man who had an arsenal of brushes — a huge array, displayed in a pleated stand-up carrier — cried out after I had just banged my brush on the bottom of the water container and said, “If you REALLY want to get the paint out of your brush, don’t just swish it in the clean water, but jump it up and down against the bottom of the container.” He said he had so many brushes because he couldn’t get them clean between colors.
 HINT 1: Bang your brush. Use two 1-quart containers (yogert or cottage cheese type) for your water. When you want to really clean your brush, don’t just swish. Bang the brush on the bottom several times and then swish, scrape it on the edge of the container and swish again in the clean water (other container). Then blot. Look at the tissue. It should be clean.
HINT 2: The TP preference. Leave your paper towels and cloth rags for major clean-ups but keep a roll of toilet paper handy.
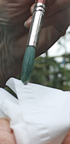
Always keep a wad (3-5 squares) always in your non-painting hand. After you rinse your brush, blot the excess before you load the brush with water* or with paint.
 As the tissue gets damp, replace it with a new wad. People are much more likely to keep the TP fresh than paper towels. Before they know it, they mop an area with a dirty towel and stain the painting.
*The greatest single reason people have trouble with wet-on-wet is that their brush has too much water when they are bringing the color to the wet paper.
HINT 3: To keep your TP easily at hand, pull out the center cardboard core and pull the TP up through the center. Put the roll in a wide cottage cheese container (see photo at top)
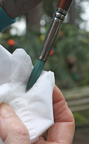
HINT 4: Add an old toothbrush to your brush kit. Use the toothbrush to scrub out an edge or soften an area. Let the area dry before you add new paint.
HINT 5: You can also use the toothbrush to straighten that wobbly edge — say around a window frame, or anywhere the brush didn’t go quite as straight as you willed it to. Knowing you can do this allows you to paint more freely with larger brushes.
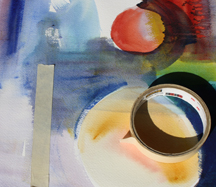
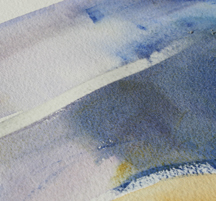 Put one piece of tape down on the edge you want darker and scrub along the edge with a damptoothbrush. Or — as in the example here — put two pieces of tape down and scrub the shape. This example was with pthalo blue (yes, you can scrub stains) on Arches 140 lb cold press (the most forgiving paper).
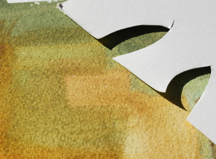
HINT 6: Make a template — here some petals to enliven an area. Or if your daisy petals look like bugs attacked the edge, make a template and scrub a little. Or make a sailboat. A bright piece of chrome. Who needs masking fluid when you can scrub out the bloops? As shown: make your template; scrub with toothbrush and clean water. Blot off the color and water with tissue.

HINT 7: Mobile Soaking for wet-on-wet. Some studios have large soaking tubs — large enough for a double elephant piece of paper — but if you don’t have the room or are on the go there are easier tricks. I use either the lid to a Rubbermaid storage box (about 2 inches of water for 1/4 sheets or 1/2 sheets) or a larger plastic container — the kind they sell for storage under your bed. This holds a full sheet — see Strertching Your Paper, June, 2009 for a photo. Slide the paper into the water like lasagna noodles.
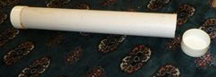
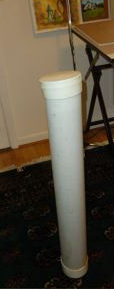 Or — enlist someone to cut a 6 inch piece of PBC pipe about 33-34 inches long. Buy a cap and the glue to cap one end of the tube. After it is dry, you fill your tube with water, roll up your painting and put it in the tube. Be sure and empty it out if you leave it outside. Mine froze and broke!
These photos are courtesy of Jean Stamper who has been using this one for at least 15 years.
These aren’t world-shaking tricks but if you didn’t know them you might be very happy to learn how much easier they can make your painting life. You certainly can say they are “worth the price of the class,” since they are free!
Happy painting!
Caroline
© Caroline Buchanan, 2010