 You are going to have some fun.
You are going to make a mess. You are going to be able to scratch your thrifty itch. And you may find yourself excitedly heading off in new directions.
A mess. Choose a place where you can make a mess, where it doesn’t matter if you drip or spill, and where you have water nearby. You might even put some newspapers on the floor ready to accept your dripping paintings for drying.
 Thrifty gene. You will want to find some old rejected paintings with relatively clean backs. And some clean paper.
You want to get out all of those tubes you have save with just a dab of paint, plus a razor blade or some scissors, some Q-tips, and some of those empty cottage cheese or yogurt containers you have saved. And all the brushes you can round up, including the lousy ones. Be sure you have a good surface on which to work and water nearby (bathtub, sink filled, or a large plastic storage tub with water in it.
Okay, you are ready!
1. Unscrew the caps on a number of different colors of pigments,
2. Take your scissors, cut the tube across the bottom and up one side.
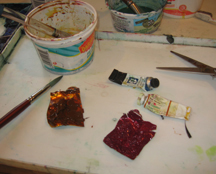 3. Take one of your brushes, one of the cottage containers with 1/8 to 1/4 c of water in it, and “wash” the pigment off the flat metal of the tube into the water. Use the point of the brush or a Q-tip to get the pigment out of the top.
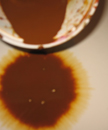
4. Stir the pigment into the water. It should be the consistency of (at least) Half n Half (no skim here). You can leave the tube in the water to get off the dregs while you
5. Move on to do another
Until you have a variety of colors — five or six at least.
Take one or more of those failed paintings and put them in the tub or sink to soak. After 5 or so minutes, take one out and hold it over the water until it stops dripping and put it on your painting surface (clean side up).
Have fun! There are a lot of ways to pour. You want to experiment. For the first one
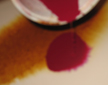
 1. Take a light color like yellow and start in the upper left corner. Pour some color onto the paper — holding the corner up with your other hand. Be sure you stir the container with a brush before you pour. Some of the pigments settle amazingly fast!
 2. Put the container down and manipulate the paper so the yellow moves through the center until it dissipates.
3. Choose another color and pour it along the edge of the yellow. Then tip the paper away from the yellow, letting the new color spread out on together. When it has spread out, tip the paper back so a little of the yellow is affected by this color…. not too much.
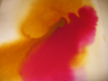 4. Choose a third color and pour it in an area of the paper that has no paint. Move the paper around but keep this color out of the center. Then pour some of it into color #2.
 5. Into an empty cottage cheese container, pour off the excess paint. You may want to pour some from one corner and some from another so they don’t cancel each other out. Set the paper down on the newspapers to dry and get another wet watercolor paper. (half sheets work well — they aren’t too small but they are easier to handle than full sheets).
Painting # 2, #4, #5, #6, etc….
You choose
 You can try layering. Pour out some colors … don’t work the sheet too long. Set it aside to dry COMPLETELY. When it is dry, place it gently in the tub of water for about 3 minutes. When you take it out, pour different colors over your first layer. See what you get.
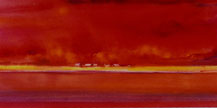
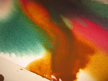
- Put down some tape or some resist. In Skagit Fire, (top) I poured the yellows and violets first. Dried it. Then I put down a few horizontal strips of tape, and poured the red…. lots of red, will a little dark blue in spots. Blotted back through the red to the yellow for some trees? smoke?
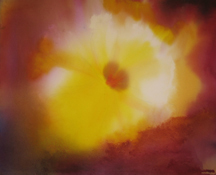 Preplan some simple shapes such as surf or clouds. When you pour, try to stay out of these shapes, blot back with dampened tissue when the color creeps into your preplanned (drawn) shapes. Here is the first pours for a (planned) yellow poppy.
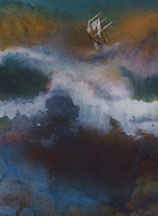
- Add texture. If you think you might want rocks or texture, try wadding up some Saran Wrap and pressing it down where you might have rocks — right before you set the painting aside to Leave the Saran until the painting is completely dry before you try to remove it.There was Saran on the “I don’t know where I am going” painting that became Into
 the Calm. I HAD TO make those sections into rocks and cliffs.
 - Lift out. You can put down tape or a little template to scrub out shapes like the building roofs, the sail boats, or the light house.
- Paint into the poured paint — negative and positive painting such as the rocks, the boat and the lighthouse.
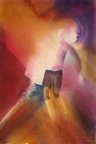
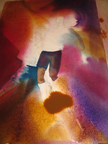
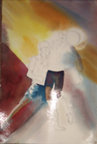
- Reawaken a painting that was going nowhere. Soak it. Pour on it and see what happens…. In the three examples of the soccer players, you see a painting that had lost its way. I chose it today and you can follow what happened.
Try to avoid:
- Colors canceling each other out toward the center. They all intermingle into a neutral while on the outer edges you find your lightest brightest colors.
- Outer edges with dried hard-edges shapes while in the center it is wet mush.
- Setting the paper aside with standing puddles of water. If you love the shapes and don’t want to pour off the excess, take some tissue and hold a corner to the puddle, letting the extra water wick up into the tissue.
Take your time. Let it dry between layers. Experiment. Have fun!! So much more to say… pour away and maybe next month we will try some others.
Caroline