Lost and found edges normally don’t just happen. You must plan. And you must use restraint. It is MUCH EASIER to complete an edge than to lose and find it.
How do you lose and find edges?
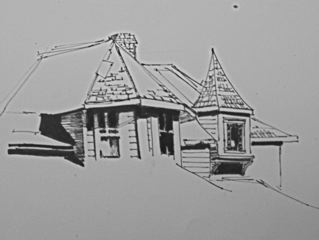 First: when you draw your design on your watercolor paper, draw the ALL the shapes, all the edges.
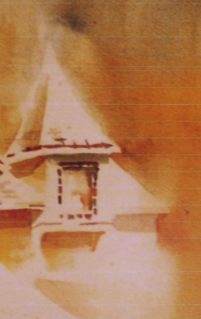
Once you are done, you look at your drawing. You can determine, even before you start to paint where some of the lost-and-found edges are going to be. You need to tell where shape comes against shape — the intersection of two lines. Don’t erase there! Where do you lose an edge? In between, where a line starts and stops, you can erase you pencil the line. The secret is that the eye will complete this edge even though you paint straight through it.
Compare photo of the painting that starts this discussion with the drawing above. Note how the vertical edge, for example, on the right side of the window wall (in the detail to the right) is described by the cast shadow at the top, dissolves into the roof only to reappear at the base, Lost and Found. The roof on the far right also dissolves into the adjacent forms, yet we believe it is there and we know what the shape — check the full painting for this.
Let’s try it.
- You need to start with a drawing that has plenty of overlapping shapes.
- Mark the overlapping intersections.
- Consider where you can erase…and erase those lines.
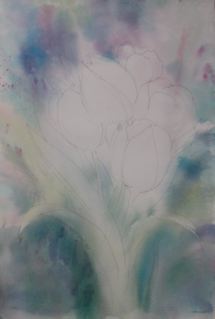 Here is the start a painting that has both a drawing and the wet on wet start but I never took it any further. It will be perfect for our discussion.
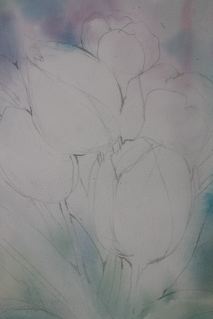 In the photo on the right I have indicated the overlaps (nodal points) where shape comes against shape. I am telling myself: This is where I will need to be clear…. will need to create an edge.
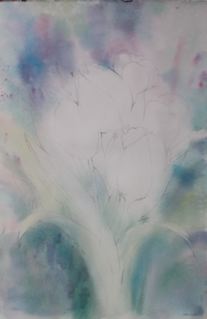 I am not sure how easily it can be seen, but I have gone through and erased the lost edges where I think the shape will read without painting all along the line.
I hope I didn’t use one of those pencils mentioned in December 2014’s Technique Corner. I am having to work to get the edges to disappear!
After you have a wet-on-wet start and have dried your paper, start painting somewhere. I start on one of the tulips, choosing yellow, describing it on the top left, letting it disappear (clean water) toward the bottom. Again I describe it on the lower right and then lose it off to the right. Use plenty of water on your brush (on dry paper) so that you can fudge out the edge with your brush and clean water or with damp tissue.
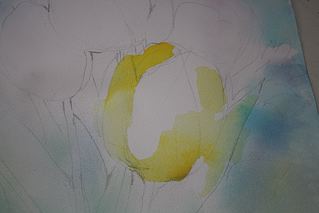
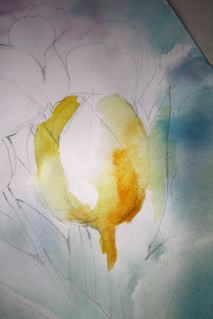
In the next photo on the left, I continue painting, and losing edges. While the first tulip was wet, I enriched the light yellow with a middle hue, Hansa yellow. On the upper right of the flower the yellow fades off with a pale green. Edges will be blended in.
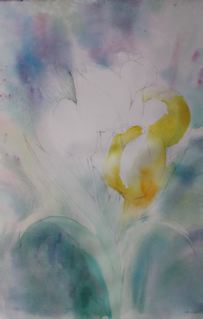
On the right, you can see both the lost and found edges of the two tulips and the beginning of a lost and found leaf.
You need to dry each of these steps before continuing. It is always surprising to students when we are working on lost and found, how much more THINKING is required to create the loose, carefree look than to finish each edge much as we did in our coloring books. Lost and found is a slow business. It takes thinking, patience, and watching what is happening.
Be sure to step back often from your painting and see how it is reading. Judge it at about 10 feet…It will surprise you how little you really need to sayto make a shape read.
To show this technique again:
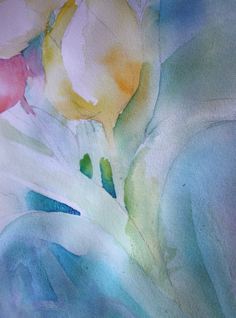 I am painting behind two leaves at the intersection of nodal point between them. I am taking the blue under the upper leaf to reappear along two stems and am changing the blue there to green. Notice that the pigments are wet, paper dry.
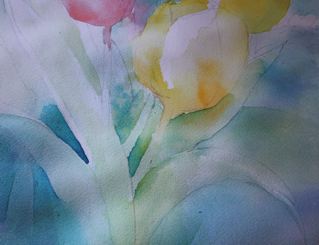
In the following photo, the colors are extended and and are fading into the bacground so that the edges of the stems and of the leaves are lost.
Slowly slowly, you work your way around, painting BEHIND for the most part, where two shapes come together as in the pink tulip, behind the 2 yellow ones.
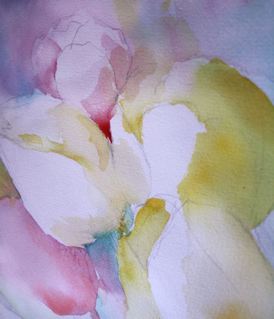
Negative painting darker behind the tips of the two leaves on the left, I liked the shapes of the brush strokes as I added the blue and left them strokes as a positive element. Now the challenge is to weave that dark through the painting. Notice the development of more leaves in the bottom of the painting – still lost and found.
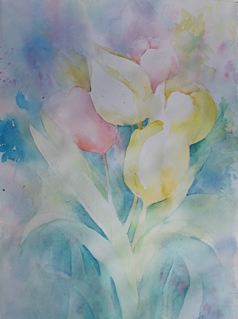 Step back and see where else you need to go. Always ask yourself if you can paint at an overlap, a nodal point, to fix what you wish to adjust.
Ask yourself if the movement along and through the lost and found shapes is working.
Now you erase all the pencil lines and see if it hangs together.
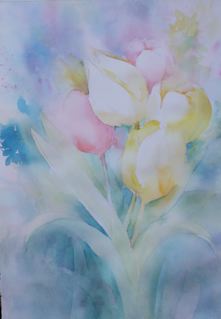 I decided I needed to go darker moving across at the level of the blue is on the left so darkered between the 2 yellow tulips and the pink one, then brough the dark out on the right side and across that leaf where there was a strip of light that wan’t working.
I developed more darks in a few more negative nodal areas, lost and found, particularly toward the bottom. Time to step back again and give it a rest.
I had a teacher when I was first painting in watercolor who didn’t like to paint flowers. To keep to the task for our flower lesson, she chanted, “Light, bright, and fresh. Light, bright, and fresh.” When you paint flowers by losing and finding the edges they DO appear light bright and fresh. They should look as if they would crush if you squeezed one in your fist.
If you need more help, may I suggest the Basic Watercolor 4-day workshop in May (control of water, how to blend your colors, negative painting, glazing) in May, or Loose and Splashy Watercolors in early August? I hope this Technique Corner helps you with painting lost and found edges. You are keeping a lot of balls in the air when you do it. It is so much easier help you when I am there in the room. Nonetheless…..
Happy painting,
Caroline Buchanan
© 2015, Caroline Buchanan
