 Funny Spots Appear on My Paper
You may be the culprit, to be specific your fingertips may be
If you have lotion, sunblock, any kind of oil on them they will damage the paper. This is particularly easy to do painting out of doors, where you put on your sunblock and then settle down to work. Try to put your sunblock on at home and wash your hands afterwards.
If you have blotted color or water off the painting with tissue or (heavens no*) a paper towel and been too forceful. Damp paper damages easily. I tell my students to think of the paper as a little child with an abrasion scrape. While the child stands there sniffling I hope you would be ever so gentle as you try to get the gravel out of the wound. If the paper were that child we would have heard an ear-splitting shriek the way some attact their paper. (* tissue is much more absorbent than paper towel and easier to manipulate)
The cleaning solution used on your board or table may be the culprit.
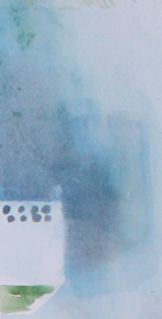
Turn the paper over. If the pattern of damage is repeated on the back as spots of color, then sizing has been destroyed and the color has soaked through.

This is the back of the painting below (I’d started drawing on this side first). See the dots of damage and the gray abraded area?
To avoid this, when you are cleaning the surface where you are going to put down your wet paper, use only water if possible. When you need more than that, I have found that Windex doesn’t damage the paper. Any of the other household cleansers are to be avoided.
This includes the tub or basin where you soak the paper. Don’t scrub it thoroughly first. Just a rinse with clear water…no chemicals.

You can see the damage in the light water area to our left. There was nothing I could do to “fix” it. There is possibly a small salvageable painting on the right.

Occasionally the damage may be an inspiration. The pockmarks in this one became texture in the trees. I had fun turning this “lemon” into lemonade. (sorry for the poor quality of the reproduction). I will also see if I can turn the lead painting of clouds and cliff into something that takes advantage of the unplanned “texture.”
My Paper Buckles
There are a number of reasons. Buckling occurs when only one area is wet. When the paper is wet, it expands. The area that isn’t wet is in a comparatively shrunken state. This causes the buckle. So why did yours?
- You are working on a block. It is glued down around the edges so when you wet the whole sheet you are guaranteed hills and valleys.
- Take the sheet off the block before you start to work (and stop buying blocks!)
- You only wet the front. The back is dry and contracted.
- Much better to wet the front and back. Or, if lazy like me, soak it for a few minutes in a basin or tub.
- You have wet a small area for wet blending and when it is dry, the paper is uneven. As you wet a number of small areas, there is a lot of buckling.
- I don’t worry about this until I decide the painting will be framed. If they have sit in a drawer or a stack for a while, they are usually flat. If not, I soak the painting one more time (yes, the paint does not come off) and staple it to a plywood board, leaving it to dry completely.
I Wobbled When Painting Against an Edge
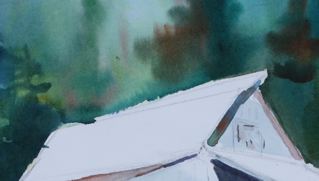 Not always easy to correct but often you can decide which is the lighter side, put a piece of tape or make a template to mask the darker side and scrub with a soft toothbrush. Some use a special brush for this purpose; some a small sponge.
You don’t have to get all the way back to white paper. Just clarify the edge.
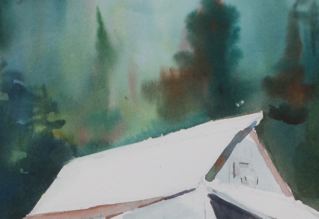 Here is a roof that needed some cleaning up. Easy because the roof was white. A piece of masking tape, a soft damp tooth brush — and a clean edge.
You can make templates cut out of those glossy advertising cards that come in the mail. Straighten out the petals of your daisy that look like bugs were nibbling on the edges.
 If you are planning on repainting an area that you have scrubbed, let it dry completely first. Then, be very careful. You have damaged the paper a bit so the less you do, the better.
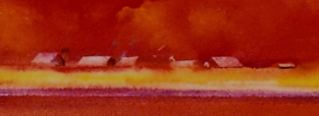
In the painting to the right, templates were made of the roof shapes with tape. The roofs were lifted (scrubbed gently) out with a soft brush. Try the technique on some scraps until you get a feel for how it works.
My Pencil Won’t Erase
Yes you can erase your pencil lines and NO you don’t erase the color too (if you are painting on Arches paper).
DON’T use expensive “art” pencils (made to last).
My children taught me this one. On their way out the door to catch the school bus, they would pass my art center and swipe a pencil as they went. I started buying Cheaper by the Dozen 2B pencils and found I could erase them more easily than my (disappearing) drawing pencils.
I find Ticonderoga 2B easy to erase. I still buy them by the dozen.
Check first if you can erase pencil.
Make a mark on the side of your paper. Erase it. If it won’t come out clean, put that pencil in the kitchen or your kid’s room and get another.
DON’T use a kneaded eraser. This isn’t what they are made to do. I like the hard white erasers best: Staedler, Mars, etc. DON’T use the end of your pencil’s eraser or the Pink Pearls. I have found they damage the paper.
DON’T press down when you are drawing. Draw from the shoulder, not with fingers all scrunched up. If you press (depress) the graphite into the paper, denting it, you won’t get it all out. Learn how to draw across the surface of the paper instead of INTO the paper.
IF you truly truly can’t get the graphite out, make it look like you meant to leave the pencil. Do a little embellishing or gesture drawing over and around the lines. It can enhance.
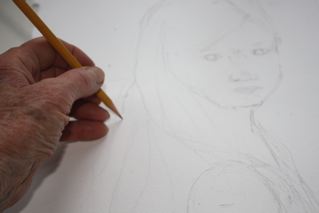
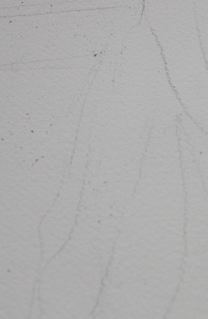 Holding the pencil lightly (balanced on my pinky) I draw a line.
On the right: the line has been erased
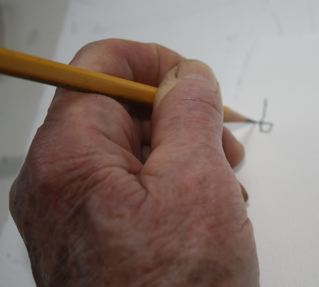 by contrast, using the same pencil, I scrunch my grip and bear down…
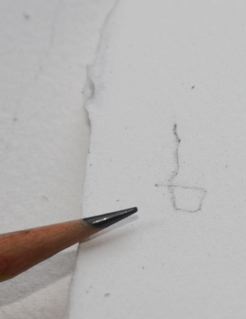 and after much harder erasing than on the first drawing, I cannot get this graphite out
Some mistakes and accidents cannot be corrected. Treat the painting as a draft and do it again with more focus, less overworking. Take the dud and turn it into a gift box!
Happy holidays!! Don’t forget to get an Amaryllis and draw it every day 🙂
Caroline
