Why stretch your paper?
Watercolor paper expands when it is wet. It shrinks back when it dries. When you wet small areas of the paper you have hills and valleys develop. These are particularly noticeble when you put the painting under a mat. However, if you soak the paper and secure (staples, butcher’s tape) it during its expanded stage, when it tries to shrink, it pulls tight and stays that way.
Some artists stretch their paper before they start to paint. They soak it, staple or tape it down and then proceed to paint. Some artists paint only on 300 lb. paper, which is less likely to buckle. When I discovered Ed Whitney in the
1970’s, I had been stretching my paper before I started to paint. I found you were committed to this piece of paper (after all that work) come hell, high water, mistakes or not knowing what to do next. Working wet-on-wet and not stretching was — I found — incredibly liberating. And I have been doing it ever since. Somewhere a long the way, I learned I could stretch my paintings AFTER I finished painting. Yep, that’s right. Nope, the paint doesn’t wash off.
 Why stretch your paper at the end?
- You don’t have to waste all that time at the beginning stretching the paper and letting it dry when what you want to do is start painting
- If you make a mistake early on, you can just set that piece of paper aside and start again, benefiting from your mistake
- You can pick it up, rotate the paper and manipulate it — getting flows of color and different effects — much more easily than when it is tacked on a board.
- It is easier to carry and store
- You can soak the paper again and again for repeated wet-on-wet glazes
- If you do repeated wet-on-wet glazes on 300 lb. paper, it buckles and then it is very difficult to get stretched flat.
- Not to mention that 140 lb. is cheaper and also uses less pigment since the pigment doesn’t soak in as far.
- You don’t have to finish a painting because you need that board. You can think about it for weeks, or months — not proceeding until you have decided where to go.
 I often do a final wet-on-wet adjustment while the paper is drying after it is stretched.
- Only the “graduates” are stretched so you put your time and effort into only the paintings that you plan on framing.
- A plus for me as a teacher — I can bring fifteen, or even 30 paintings, at different stages of development, to help illustrate parts of lessons when I am teaching. I just put them in a portfolio and tape them up on the walls of the classroom, changing them as the lesson progresses. Just imagine dragging 30 boards down the hill, into the boat, out of the boat and into the car, out of the car and into the classroom!
 No the color doesn’t come off.
Watercolor, particularly when you start wet-on-wet, bonds with the paper (see last month’s discussion of pigments).
However, if you stick your thumb in a saturated area, you will make a print. If you are careful and only hold the edges, the molecular tension bonds the wet pigments and they don’t wash off.
 But check — if you see a color migrating into a light area, blot it off gently with some tissue. Because of the possibility of this happening, I save the small dry, hard-edged darks until after the paper has been stretched — such as the dark inside a broken window.
 Stretching a painting
You need
- A plywood board. It is better if it is older rather than new and full of acid. It is not a bad idea to seal a new one with some wood sealer or varnish. If you are only painting on small sheets, you may stretch on Gator board. I have found that the staples pull out as a full sheet dries.
- A staple gun — the kind that is used for insulation — and 3/8 or 1/2 inch staples.
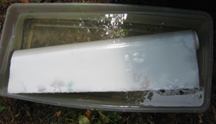
- Somewhere to soak the painting. A small one can be soaked in a kitchen sink. Bigger ones can be soaked in the bathtub. Or, I bought a plastic container — the kind that is sold to store sweaters under the bed. I keep it out by the hose and water plants afterwards. Several places I have been, the resident artists had a square tub larger than a full sheet and about 4 inches deep. Ideal!
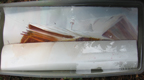
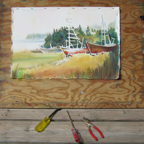
- a tack pulling tool(see photo) or a screwdriver and a pair of pliers to pull out the staples
 Put the painting in the water. If it is too large, put it in more or less the way you put lasagna pasta in a pot: Submerge part and then gently roll it until the whole paper is under water. Of course it is better if you can just float it. In Oregon I had a hot tub I no longer used. It was on a deck right below my studio. I would leave paintings down in the tub until I was ready for them. And yes, I did forget them and leave them over night. The paint was still fine in the morning!
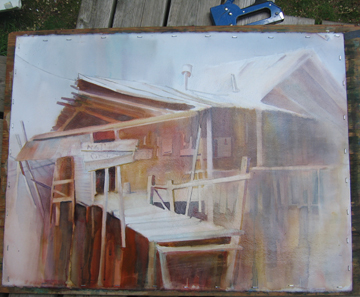
 Staple it to the board. Lift the painting gently out of the water. You may hold it and let the excess run back into the tub. Then set it down on the board. YOU don’t stretch it (pull on it). Staple it about 3 inches apart and a half inch in from the edge. You need to have planned your design so that about 1/2-3/4 of an inch around the paper can go under the mat without hurting the composition.
Warning: When you are stapling, be sure the heel of the staple gun is not on the paper. This means you need to rotate the board as you staple. Otherwise the heel will make awful marks in the painting!
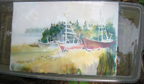
Paint into the wet surface. This is the time to glaze the sky a little darker, dull the greens in the corner, add a richer gold to the field, do a unifying glaze to the entire foliage area setting it back. Use sedimentary paints (see last month). Be gentle.
 Dry it thoroughly. You may stand the board up or leave it flat. You may put it in the sun. This is when I photograph the painting. You want to leave it long enough in a dry place that the board dries too. If any moisture is left in the paper, it will buckle when you remove the staples.’
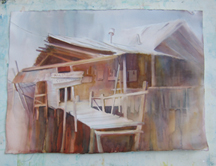
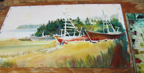
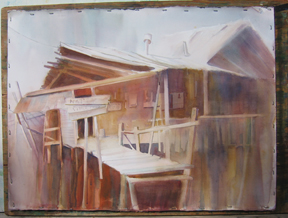
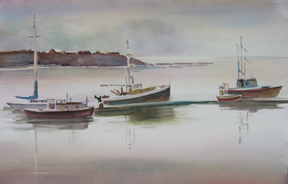
If you want to, you set it aside at this point for the fine tuning. for example in the boat one, I will develop the detail below the middle boat and do a bit of dry work on the grasses. There is still more fine tuning to be done on the shack. The boats on a foggy morning are finished and pulled off the board.
 When you are sure it is dry:
Remove the staples: Do this with care. You do not want to tear the painting. ALWAYS put your tool under the painting and pry up from underneath the painting. If you try to 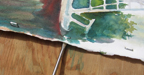 remove the staples with the tool on the top of the painting, you are running the risk of slipping and tearing the painting with the tool.
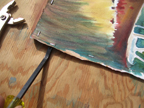 I like to use a tack puller like you see in the photo by the boats. You can also use a screw driver but with it you will need pliers for sure.
Loosen the staple with the tool and then remove it with the pliers. Be sure you have every one before you pick up the painting.
If you have a fair amount of margin, you may want to take a mat knife and cut the painting free of the staples. Then you have a very crisp edge. It is easier to pull the staples out of the board then because you don’t need to be so careful. Often, after the staples are removed, I put a straight edge on the line of staple holes and cut off the excess with the mat knife. The bumpy paper on the outside of the staples is then a thing of the past and the painting stays flat in the mat.
 Sign it when you have determined the placement of the mat. I like to sign it in the lower left corner with a darker value of the hue used there. Under my signature I place © and the year.
You want a presentation of which you are proud the set off the beauty (and hard work) of your painting. We’ll get back to painting next month.
©2009 Caroline Buchanan