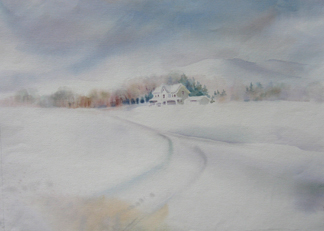
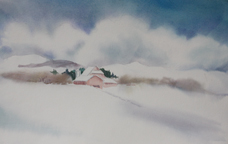
The Way Home
It is that time of year and as the white stuff swirls down aren’t you tempted to try to paint it? You could always frame a blank piece of paper and label it “Whiteout.”
All right. This is a joke, but it is also a hint about how to paint snow. It is all there. What do you need to do to convince the viewer that the white of your paper is snow?
Guess what? It is another example of working wet-on-wet. You can have fun with it — fling some salt or even use some rough sand paper (Winslow Homer did). But first, decide what you are painting. In other words, once again you need to do several value sketches and come up with a plan.
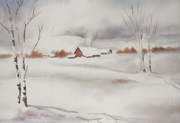
Winter Farm
How much is sky? How much is snow? Where are we going in your painting — up, down, across? How are we getting there? How near or far is the scene?
Besides those choices, you also need to decide about the weather. Is the sun out and casting shadows? Is it a overcast day? A blizzard? Night?
Once those decisions are made, draw the contours on Arches 140 lb cold press (or rough for a blizzard) and soak your paper as described in the May, 2010 Technique: wet-on-wet.
Wet on wet: Now is the time for big sweeping strokes in your sky. It is also the time to put the color on the soft shaded sides of your snow mounds. Even on a cloudy day you can show a soft light direction. Don’t just use a mixed gray. Besides a cool blue gray, add a little sparkle of pink or lavender, even yellow. But leave most of the paper white. If you are planning on some bare trees, this is the time to put in a soft area of grays for the trunks and warmer tones for the branches — nothing too strong. Then, after the paper is dry, you will negative paint the spaces between the trunks to make the winter woods.
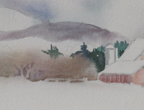
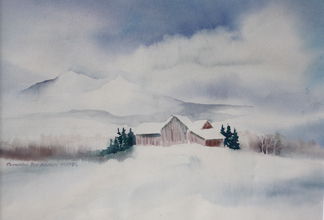 Negative painting: Once the paper is dry, carve out your important snowy white shapes by negative painting behind them — for example in Winter Farm the saved whites during the wet-on-wet included but were larger than the snowy roof. The soft warm in the sky started around the shape of the roof and then was blended back until it disappeared, with the help of clean water, into the earlier wet-on-wet sky wash. In the fragment above, the negative painting of the tree trunks and the snowy roof pop out the focal area.
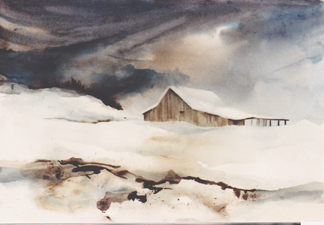
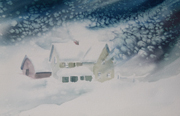
 If you want to show snow behind another mound of snow, do this starting on dry paper. Then quickly feather it out into the white paper with clean water (foreground of Skagit Blizzard and where a track coming in from the right seems to merge with the curving road in The Way Home. The same is true with the sky behind the left side of the snowy hill. Notice the right side is darker than the sky. Lights against darks becoming darks against lights — counterchange. Weave them into your paintings.
 Inductive color. One of the biggest mistakes people make in painting snow is trying to show sun on snow by painting the snow yellow. It ends up looking like sand. We will talk about it again but the secret of making the snow seem sunny is by the lavenders and blues in the shadows. Get your shadows right and the white paper will sparkle with the feel of sun on the snow!
For shading of snow on the rooftops, see the November 2008 Technique, watercolor cards.
Salt. You CAN get snowflakes by sprinkling salt at the right moment, right as the shine goes off the wet on wet. Caution: just sprinkle a little. It will either work or it won’t. But you have to wait until it dries to find out! Don’t get impatient and sprinkle more. It has wrecked many a nice start. I would suggest practicing some to get the timing before trying it on your painting.
old demo; a little heavy on the salt
 Sandpaper. When you are done with painting your blizzard and you perhaps wish you had saved more whites, try sandpaper. Be sure the painting is totally dry. Fold a piece so you can grasp it between your thumb and forefinger and give a strong swipe in the direction the wind is moving the snow. You may do it more than once. In fact you may like it so much you may try some more highlights. But NEVER NEVER paint on top of where you sanded. You have changed the surface of the paper. Any paint will react differently and show the spot as a bruise.
 Stay warm and keep it merry!
Caroline
© 2010, Buchanan Watercolors Ltd