The artist in you dwells in your right brain – and in your heart. Our culture assumes that you cannot be an artist without drawing things “right.” If you can’t make your drawing look like they do in the three-dimensional world, many people scoff at you. Students come to me certain that they cannot become artists because they just can’t seem to get perspective.
The confusion is that we have to leave our right brain and use the left to do perspective drawing. I am going to try to make it as simple as possible and promise — no vanishing points; they are almost always off the paper and in the next room, anyway.
 .
.
Perspective is used to convert the appearance of the 3-dimensional world onto a 2-dimensional piece of paper. I use what I call “empirical perspective.” The nices thing about it is that gradually you get better and measure less but in the meantime, measure carefully and learn to get the sense of the 2-dimensional plane.
It helps if you get an empty slide holder, or make one:
You are reducing the 3-d world to 2 dimensions when you look at your subject through the slide window.
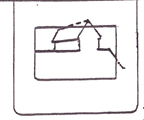 Hold the slide in front of you so that you can see the edge (line) you want to draw. In this case, the back edge of the barn.
 Once you line it up with a side of the frame – here the top. Hint: always hold the frame square — vertical is vertical. Place a straight edge (card, pencil) on the subject line; look at it and reproduce it on your paper. Check it.
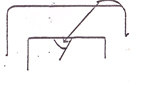
You can set the frame with its angled straight edge on the top of your sketchbook, if you need to, and copy the direction of the line that way. Try some — even draw the corner of the room where you are now.
Okay, you have a tool that will help you to reduce three dimensions to two and enable you to reproduce the appearance of lines that are out there. The flat slide keeps you from sticking your pencil, as you measure, into the 3rd dimension.
 When we draw in perspective, we tell the viewer where we are in relation to the drawing. It tells them where they are.
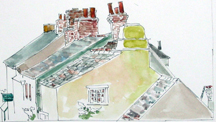
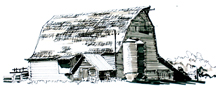
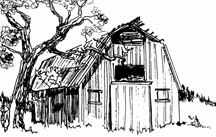
Where is the horizon line? Your eye level. In the drawing on the top of the page, I was sitting below the tops of the roofs and above the bottoms. As a matter of fact, my eye level is exactly that of the top of the front roof at the bottom of the page.
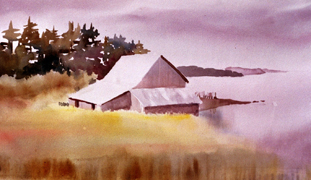
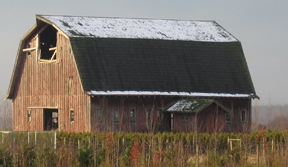
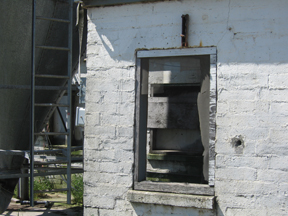
Where are we in the second painting? The roof of the barn is roof is over our heads. Do you see how the horizon line feels at our eye level? The rest of the barn is below us.
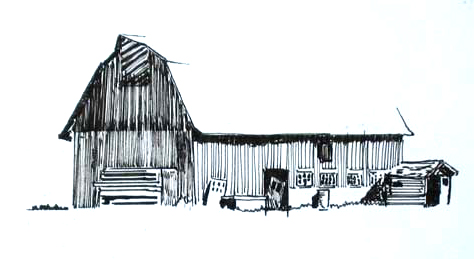
 In the barn drawing on the front of this post, I was sitting low in the grass so that the horizon and my eye level are almost at the base of the barn. Note that the extension on the right has started to lose its footing and is “wrong.” It is slanting the wrong way for perspective. Do you see how uncomfortable you are about its perspective? We feel something is not right.
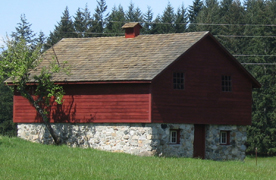
Below it is a photo of the barn with a little painting (watercolor sketch) I did for the owner. Here it is in better light for drawing. You can use this building or the one of the right to try the 7 lines of perspective. Then go outside and do it with your slide frame and a real building.
 1. Start with the line closest to you that you can see clearly. I usually start with the nearest vertical corner.
How big you draw that line sets the scale of your drawing. Where you place it, determines how the building will sit on your paper.
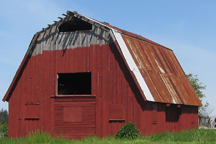
2. Draw the next connecting line. In this case it would be either the (slanted) bottom of the roof or the slanted front of the roof. Or –it could be the bottom of the red side — which is horizontal, your eye level. Let’s do it first!
3. Keeping things in scale. You use your first line to determine how long your other lines are. On the barn on the right, the red and white vertical is half the length of the red horizontal side. Draw it.
4. The next lines. In the same way, measure the bottom of the roof, the top of the roof and the front. Get the angle. Each of these slants. Draw that line on your paper lightly. Check it to make sure it is right. Then measure how long it is and mark it. Draw the ground at the bottom free hand and fill in the back red and white vertical edges.
 If you were doing this outdoors, you would hold your slide up to get the angle.Draw the line on your paper.
Hold your pencil in front of you and put your thumb on the bottom of your measuring line. Then turn your pencil and count how many times it goes along the new edge. Be sure not to put your pencil into space!
5.The back edge of the roof on the front plane — It gets easier as you have more lines but be careful. Measure the angle. Measure the length. It is always smaller than the front roof . Check the end of the roof by comparing the edges of the bottom of the front roof and the back. Notice that the back edge is lower. Be sure and allow for the overhang.line.
6. The back of the roof. (left on the red apple barn, right on the first barn and the 3rd one). It is almost always parallel to the front line of that roof plane. It is always smaller.
7. Put in the back walls — watch for how much overhang there is and place them in by that amount. They are shorter than the first line you drew.
You are done unless you want to try the vent on top. You have the building. You can add shading, texture,trees or whatever else you want to add. Notice that each of these rectangular shapes are trapazoids — larger in front and smaller in back.
 The eight lines:
nearest vertical
front of roof
top of roof
bottom of roof
far roof on the front edge
back wall, left
back wall, right
back of roof
You may want to try this window for the simple rectangle in space. Also do the ladder. Notice how each rung is at a different angle.
 Here are some rules to help you along:
1. The horizon is always at your eye level
2. Draw first the nearest line that you can see clearly.
3. Any line going away from you that is over your head slants down in the back.
4. Any line that is below you, slants up.
5. The closer they are to your eye level, the less they slant.
6. Verticals are vertical — unless the building is starting to fall down.
7. Rectangles going away from you are trapazoids, with the further line shorter.
8. Recheck each angled line after you draw it to make sure you got it right before going on.
Get out there and start proving that you, the artist, can also draw things in perspective!!
Happy drawing,
Caroline
©2011, Caroline Buchanan